Initial Meeting with one of our professional Project Planners
We’ll meet with you, the homeowner, to do an initial inspection and complete a walk-around of the home. It’s important that you and anyone else who should be involved in the painting process be present on a walk around to assess any damages and get a better understanding of what you’re looking for. After your Project Planner completes their measurements, they’ll be sure to answer any questions and talk through what you can expect throughout the painting process:
- Separate estimate will be provided for any wood repair and explain the wood replacement process
- Separate bid for any gutter replacement services that you should need
- Color selection process – we love to help with colors since that’s the fun part of the process!
- How long will your project take?
- What type of paint we use and why. Not all paint is created equal!
- 3 different options in terms of warranty and paint material. Which one is best for you?
- What makes us different and why?
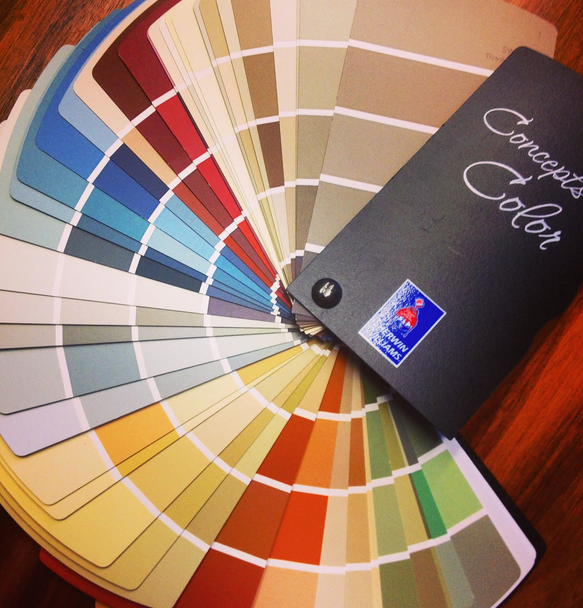
Let’s Pick Colors
- Start by looking over our recommended Exterior Color Combination scheme selection guide.
- We offer free color help during our estimates to assist with this fun part of the project. This is our opportunity to give your home an incredible face lift.
- Drive around and looking at color schemes in your neighborhood. This can be a good method of finding out what you like while seeing it on an actual home. It also gives a good idea of what colors may be accepted by your HOA.
- BEST PRACTICE: choose 2 color schemes in case one of them is denied by your HOA (Home Owners Association).
- Color Visualizers/Color Snap – this is a Sherwin Williams free tool that could help play a big role in deciding what looks good on your home
- Matching Existing Colors
- Your Project Planner can help with this at the estimate. They’ll do a great job at finding comparable colors to your existing one. Remember, your current paint is faded, so matching to it will be difficult.
- Once Colors are chosen, a color release form must be signed to ensure the correct color of paint is applied. This form can be submitted via email to info@vivaxpros.com.
Once You’ve Chosen Us to Be Your Painter…
- Sign the agreement form which specifies the exact colors and where they’ll go! Form can be found here too.
- Your assigned Project Coordinator will be calling to confirm they received the color information as well as to discuss a tentative pressure wash date, paint date and the status of color information.
Timing and details
Your Project Coordinator will be your point of contact in the office, confirming dates to schedule
and gathering your HOA / color information.
- Introduction call by Project Coordinator will take place within 2 days of agreement confirmation. They’ll confirm which warranty you’d like to choose, special conditions specific to your project, wood replacement details, Home Owner Association approval process and color selection information.
- If your home needs wood replacement, our Woodwork Manager will be scheduled 2 weeks prior to the paint start date to reassess, and repairs done prior to painting
- Once the pressure wash and paint dates are set you will receive a confirmation email and overview of process.
- Finalized/HOA approved (if necessary) color selections must be confirmed no later than the Monday 2 weeks prior to scheduled paint date.
The Pressure Rinse (Wash)
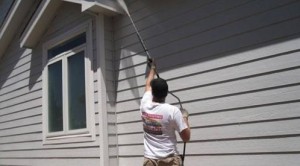
- The pressure wash is designed to rinse away chalky residue, remove dust, mildew and some loose paint.
- It may happen between 1 day up to 1 month prior to painting start date.
- If the washer happens to miss something or could not reach something on the house, during the prep time, the painters will wipe down the house removing all cobwebs and debris.
- As far as whether it’s necessary to be home, the answer is No!; we only need access to your back yard and to your water spigot.
- As a precautionary note, please secure any pets left in the backyard during the day, shut all windows and remove everything off any decks, porches, etc. All patio furniture should be moved away from the house, if possible, before the pressure wash and painting process until the job is complete.
- The pressure washer will contact you the morning they are scheduled and give an estimated time of arrival; if you do not answer, will leave a message and proceed with the wash.
Inspection Prior to the Job Start (Pre-job walkthrough)
The Project Manager will call no later than Saturday before your scheduled start date to coordinate a pre-job walk through to confirm:
- Color selection, color location, type of finish
- Warranty, repairs, special conditions, prep work
- Timeframe for completion, what time the crew will be arriving to start
Prep and Paint
If you haven’t been impressed with our communication and service yet, this is certainly where we’ll stand out. Our Project Mangers oversee the paint job production and is your main point of contact on site. This is our quality control component as well as customer service agent! The Project Manager will provide daily check-ins including prep-inspections, prep photos, and end-of-day updates during the prep and painting process. The Crew Forman will oversee the crew and will be on site through the entire painting process. Once details are confirmed, homeowners do not have to be there for the rest of the process.
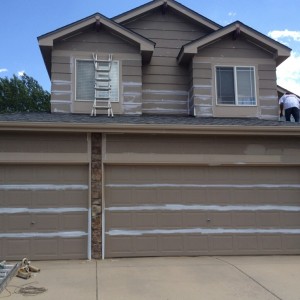
Prep Work- arguably the most important part of any successful paint project
- We’ll scrape loose and failing paint to create a smooth surface for painting.
- Our painters will prime the bottom 3 boards around your home where moisture sits. Any bare wood will be sealed.
- Caulk seams, specified cracks around doors/windows, using 40 year, 100% acrylic caulking. This prevents further water damage and creates the best possible appearance.
- To provide a tidy jobsite, covering necessary areas with drop cloths, taping and protecting areas that don’t need painting will be done at this time.
Painting
- Spray siding in order to apply an even finish coat, using top of the line Sherwin Williams materials.
- Brush and roll all trim with detail, care and precision.
Our crews perform daily job-site cleanup and will complete regular inspections with client and Project Manager to maintain open lines of communication.
Final Walk Through and Collection of Payment
The job is NOT complete until we perform a final walk-through. Your Project Manager will contact you to coordinate this at your convenience.
This step is to ensure that the paint job is up to customer satisfaction. Payment is collected in full after you are completely satisfied.